


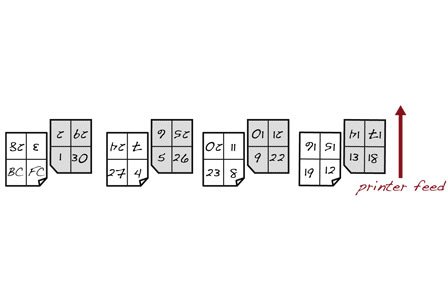
1. Format and design your short poetry or prose manuscript using word processing software such as Microsoft Word, or a desktop publishing program such as QuarkXPress or Adobe InDesign, or by cutting and pasting your text onto the pages (use scrapbook paste; regular glue will cause buckling). Create eye-catching covers using found images, rubber stamps, or—for a minimalist, vintage look—a serif display font on a letterpress. Regardless of which method you use to lay out your book, the pages must be formatted in four-page signatures, a special configuration that ensures the bound pages will end up arranged in numerical order (fig. A). You may want to create a mock-up version using standard paper to ensure your pages are formatted properly.
2. For your final book, use an 8 1/2 x 11–inch stock of medium thickness for the body (a thicker page will cause bowing). Print all the front sides first, then print on the back, making sure to feed the paper in the correct orientation (fig. A). The covers can be printed on the same paper or printed separately on a heavier color stock.

3. Cut each page in half horizontally (fig. B).

4. Fold each page in half vertically, creasing with a ruler or straightedge (fig. C).
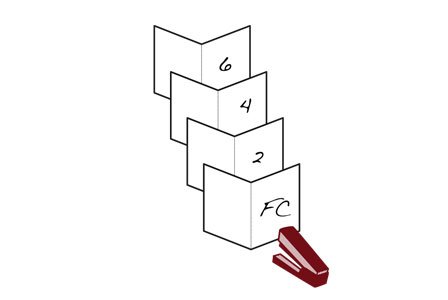
5. Stack the pages so that page numbers appear in order, then staple along the middle (fig. D).
*Makes a 4 1/4 x 5 1/2-inch book with thirty-two pages